Getting Started
Appflow is the tool used to build and distribute your web bundles across your team and deploy Live Updates to your end users.
You can login to Appflow here, either using your email address or an org slug if one has been provided to you.
When going through this tutorial, it will be beneficial to keep in mind the structure of your organizaton and how the responsibilities will differ between teams. In an organization with web and native developers, the web developers will be responsible for setting up the apps in Appflow and performing web builds/deployments, while the native developers will be responsible for configuring the Live Updates SDK and using the Portals CLI to pull down the appropriate web bundles during build time.
Accessing the debug project
We will be using the portals-debug-app repository for the purpose of this tutorial, however Appflow will support any web app that can be compiled with npm or yarn.
Start by forking or cloning the portals-debug-app repository. If you choose to clone the repository, you should push a copy of it to the git provider of your choice (Appflow supports Github, Gitlab, Bitbucket, and Azure DevOps).
If you are using your own web app rather than the demo project, then you should add a capacitor.config.json file to the root of your web project. Capacitor is not technically needed as a web project dependency, but the configuration file will help provide some configuration options for Portals. The following configuration can be used:
{
  "appId": "io.ionic.starter",
  "appName": "Portals Debug Web App",
  "webDir": "dist"
}
Our demo project already contains a capacitor.config.ts file which gets compiled to a json file during the build process, so adding one to the debug project is not necessary.
Creating a new Appflow app
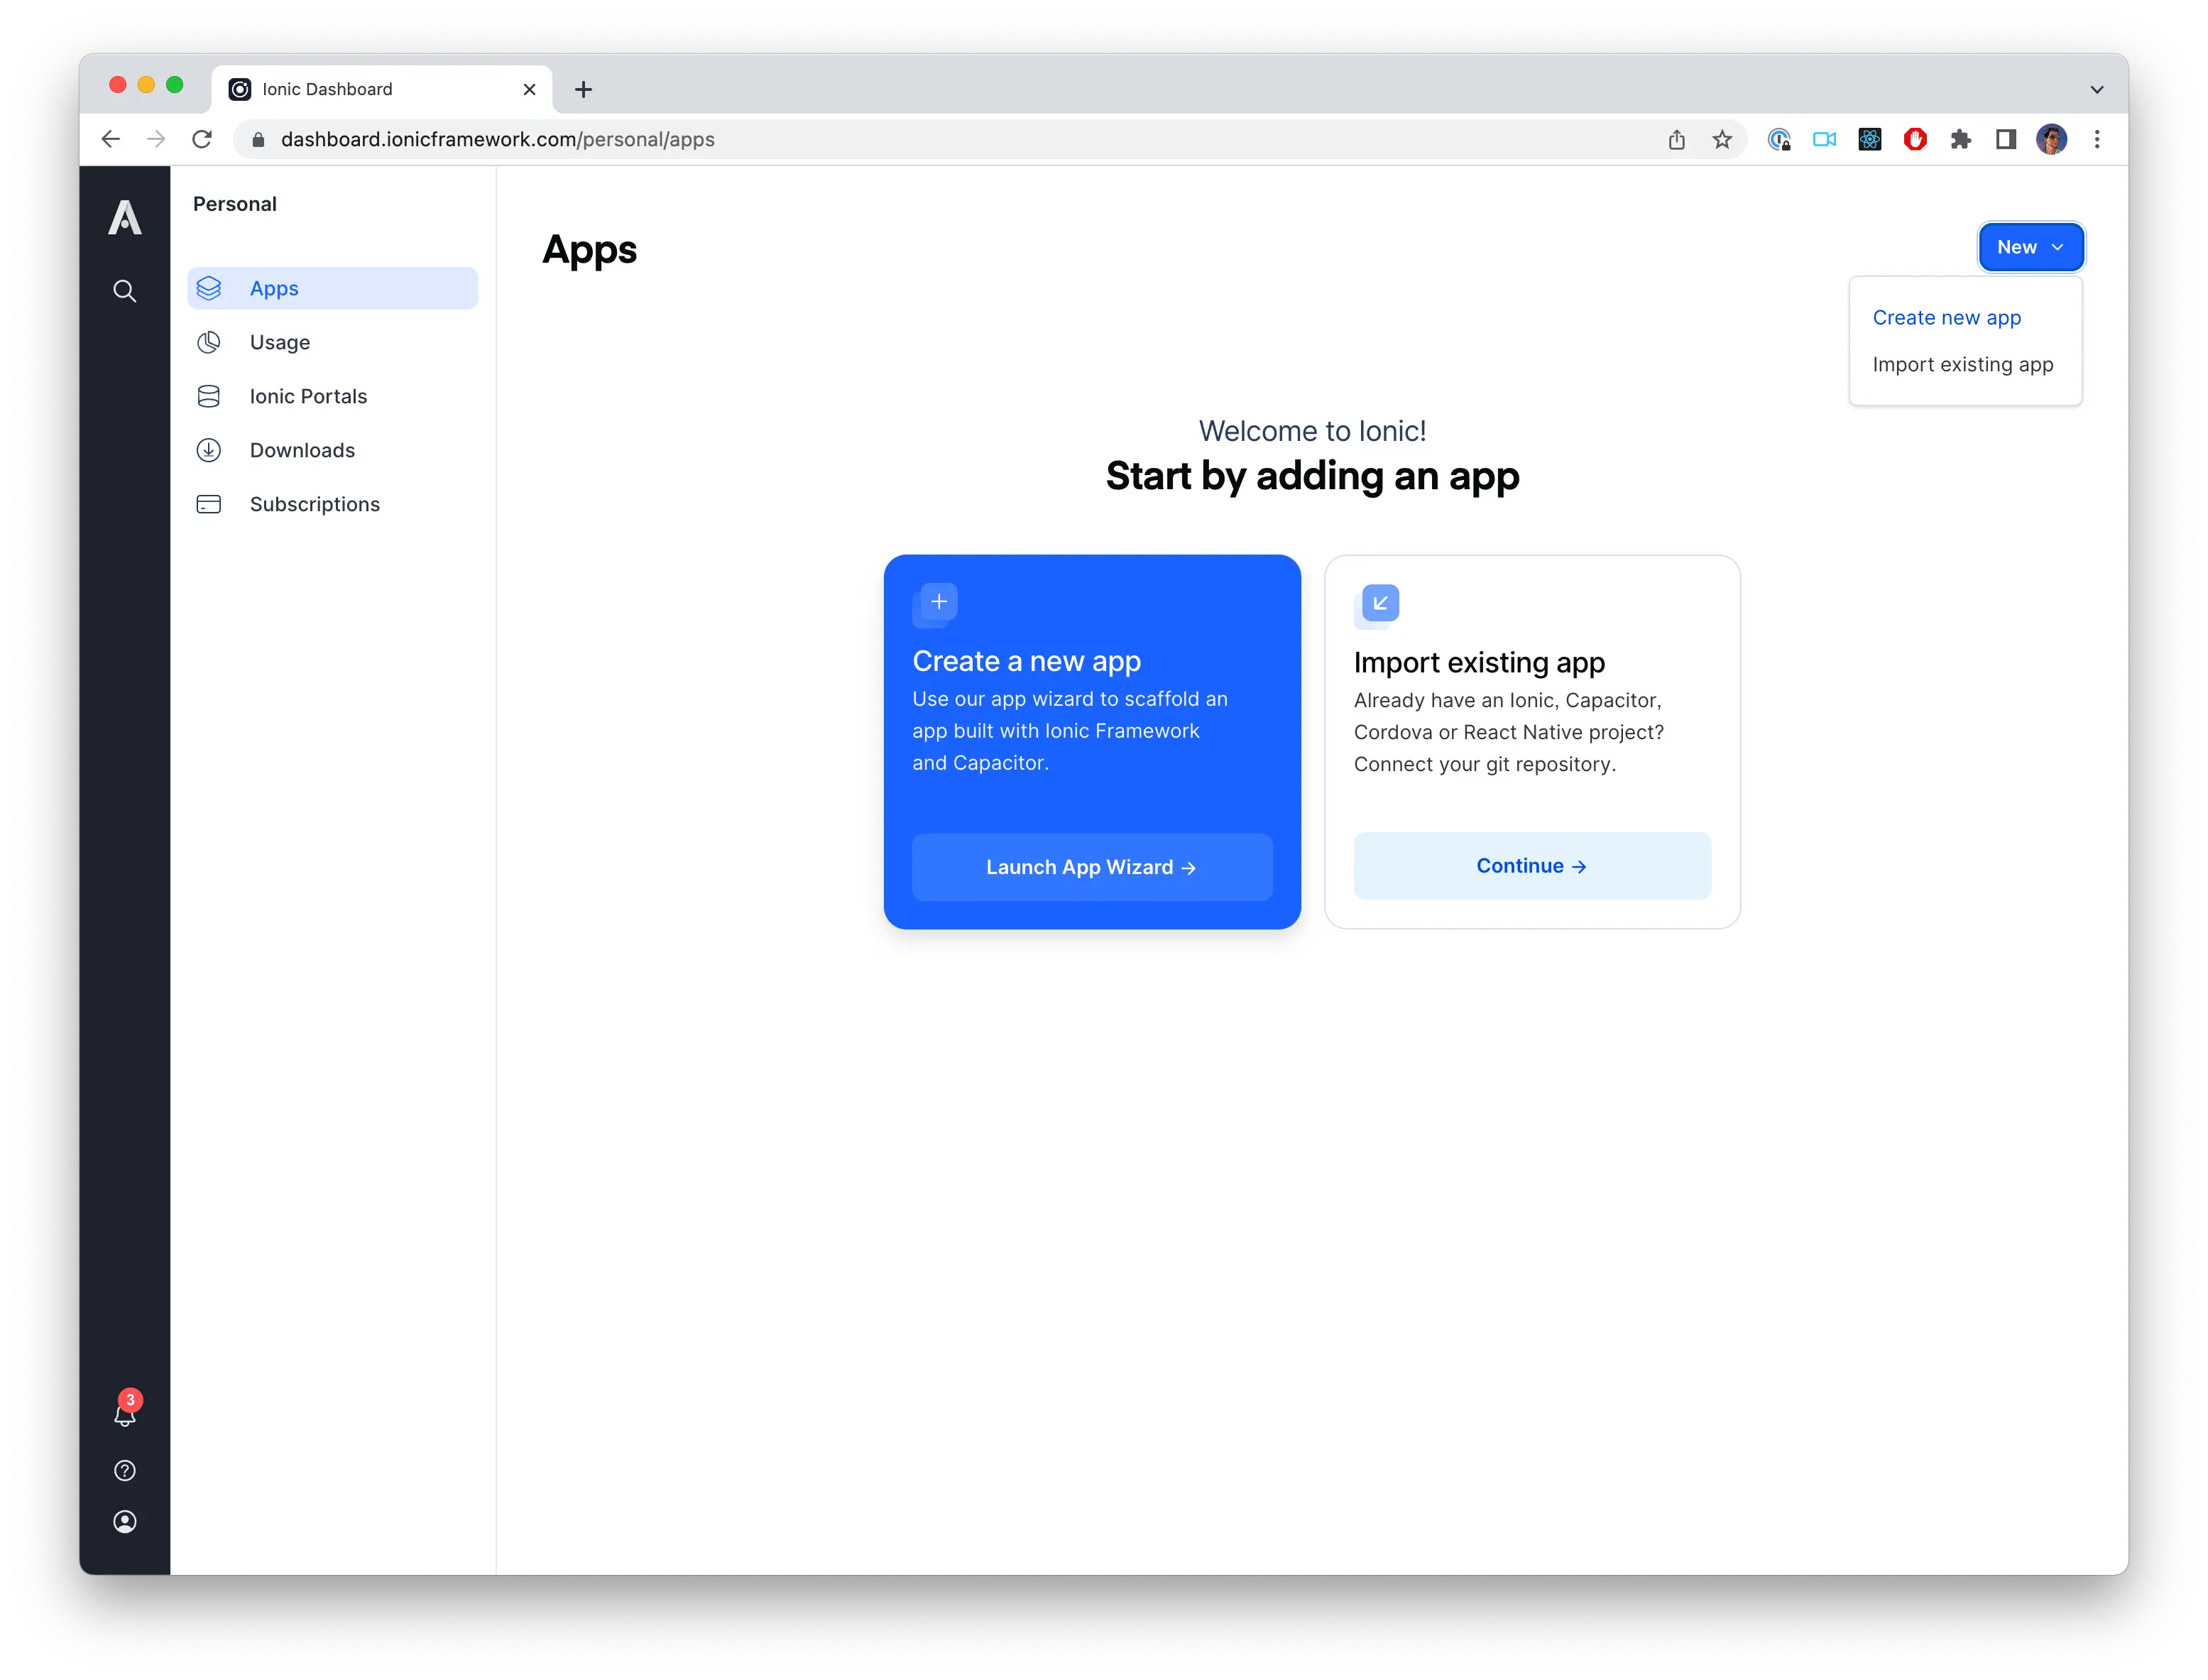
After the app has been made available in a git repository, you can create a new app in Appflow. Navigate to the Apps page in Appflow and select New app in the top right. From the drop down, select Import app.
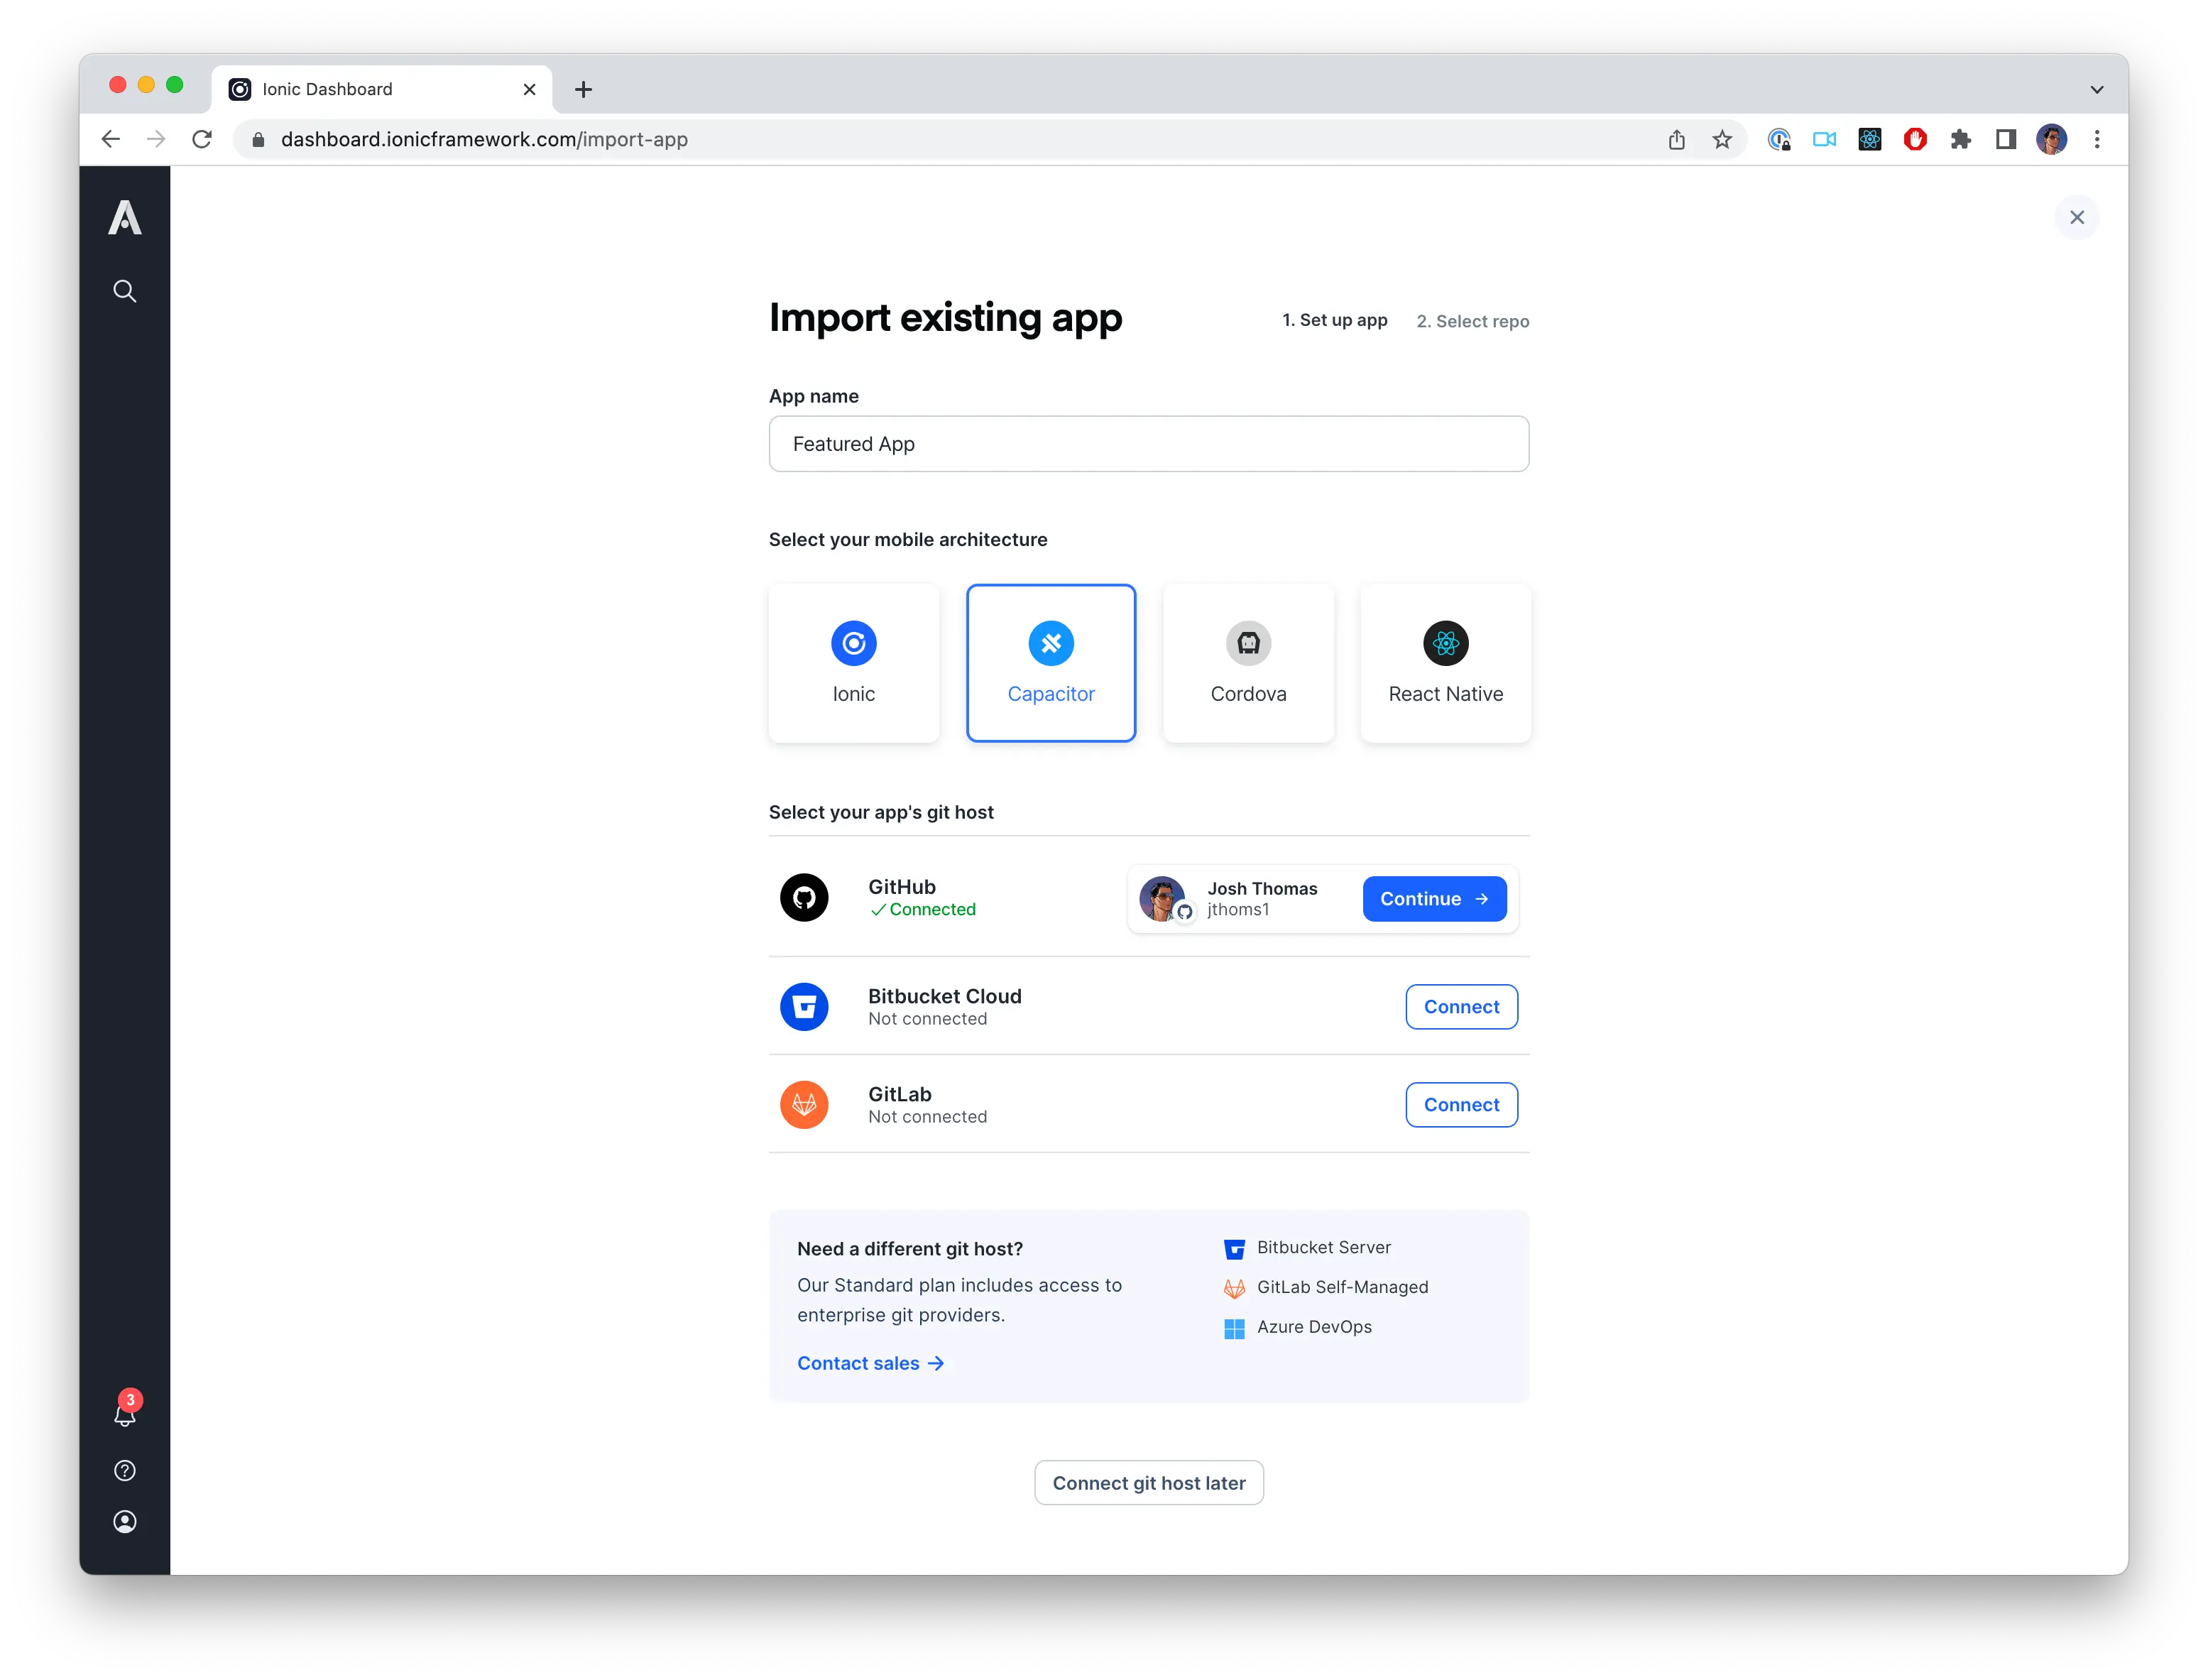
On the Import existing app screen, select Capacitor as the mobile architecture and link the appropriate repository. The app name you provide is only used to identify the app in Appflow, so you may use whichever name makes sense for you.
Performing a new build
After the app has been created, you can navigate to the Builds page to perform a build. Anytime you want to deploy a new version of the web application, you will need to create a build from this screen or by using the Appflow CLI (which will be covered later).
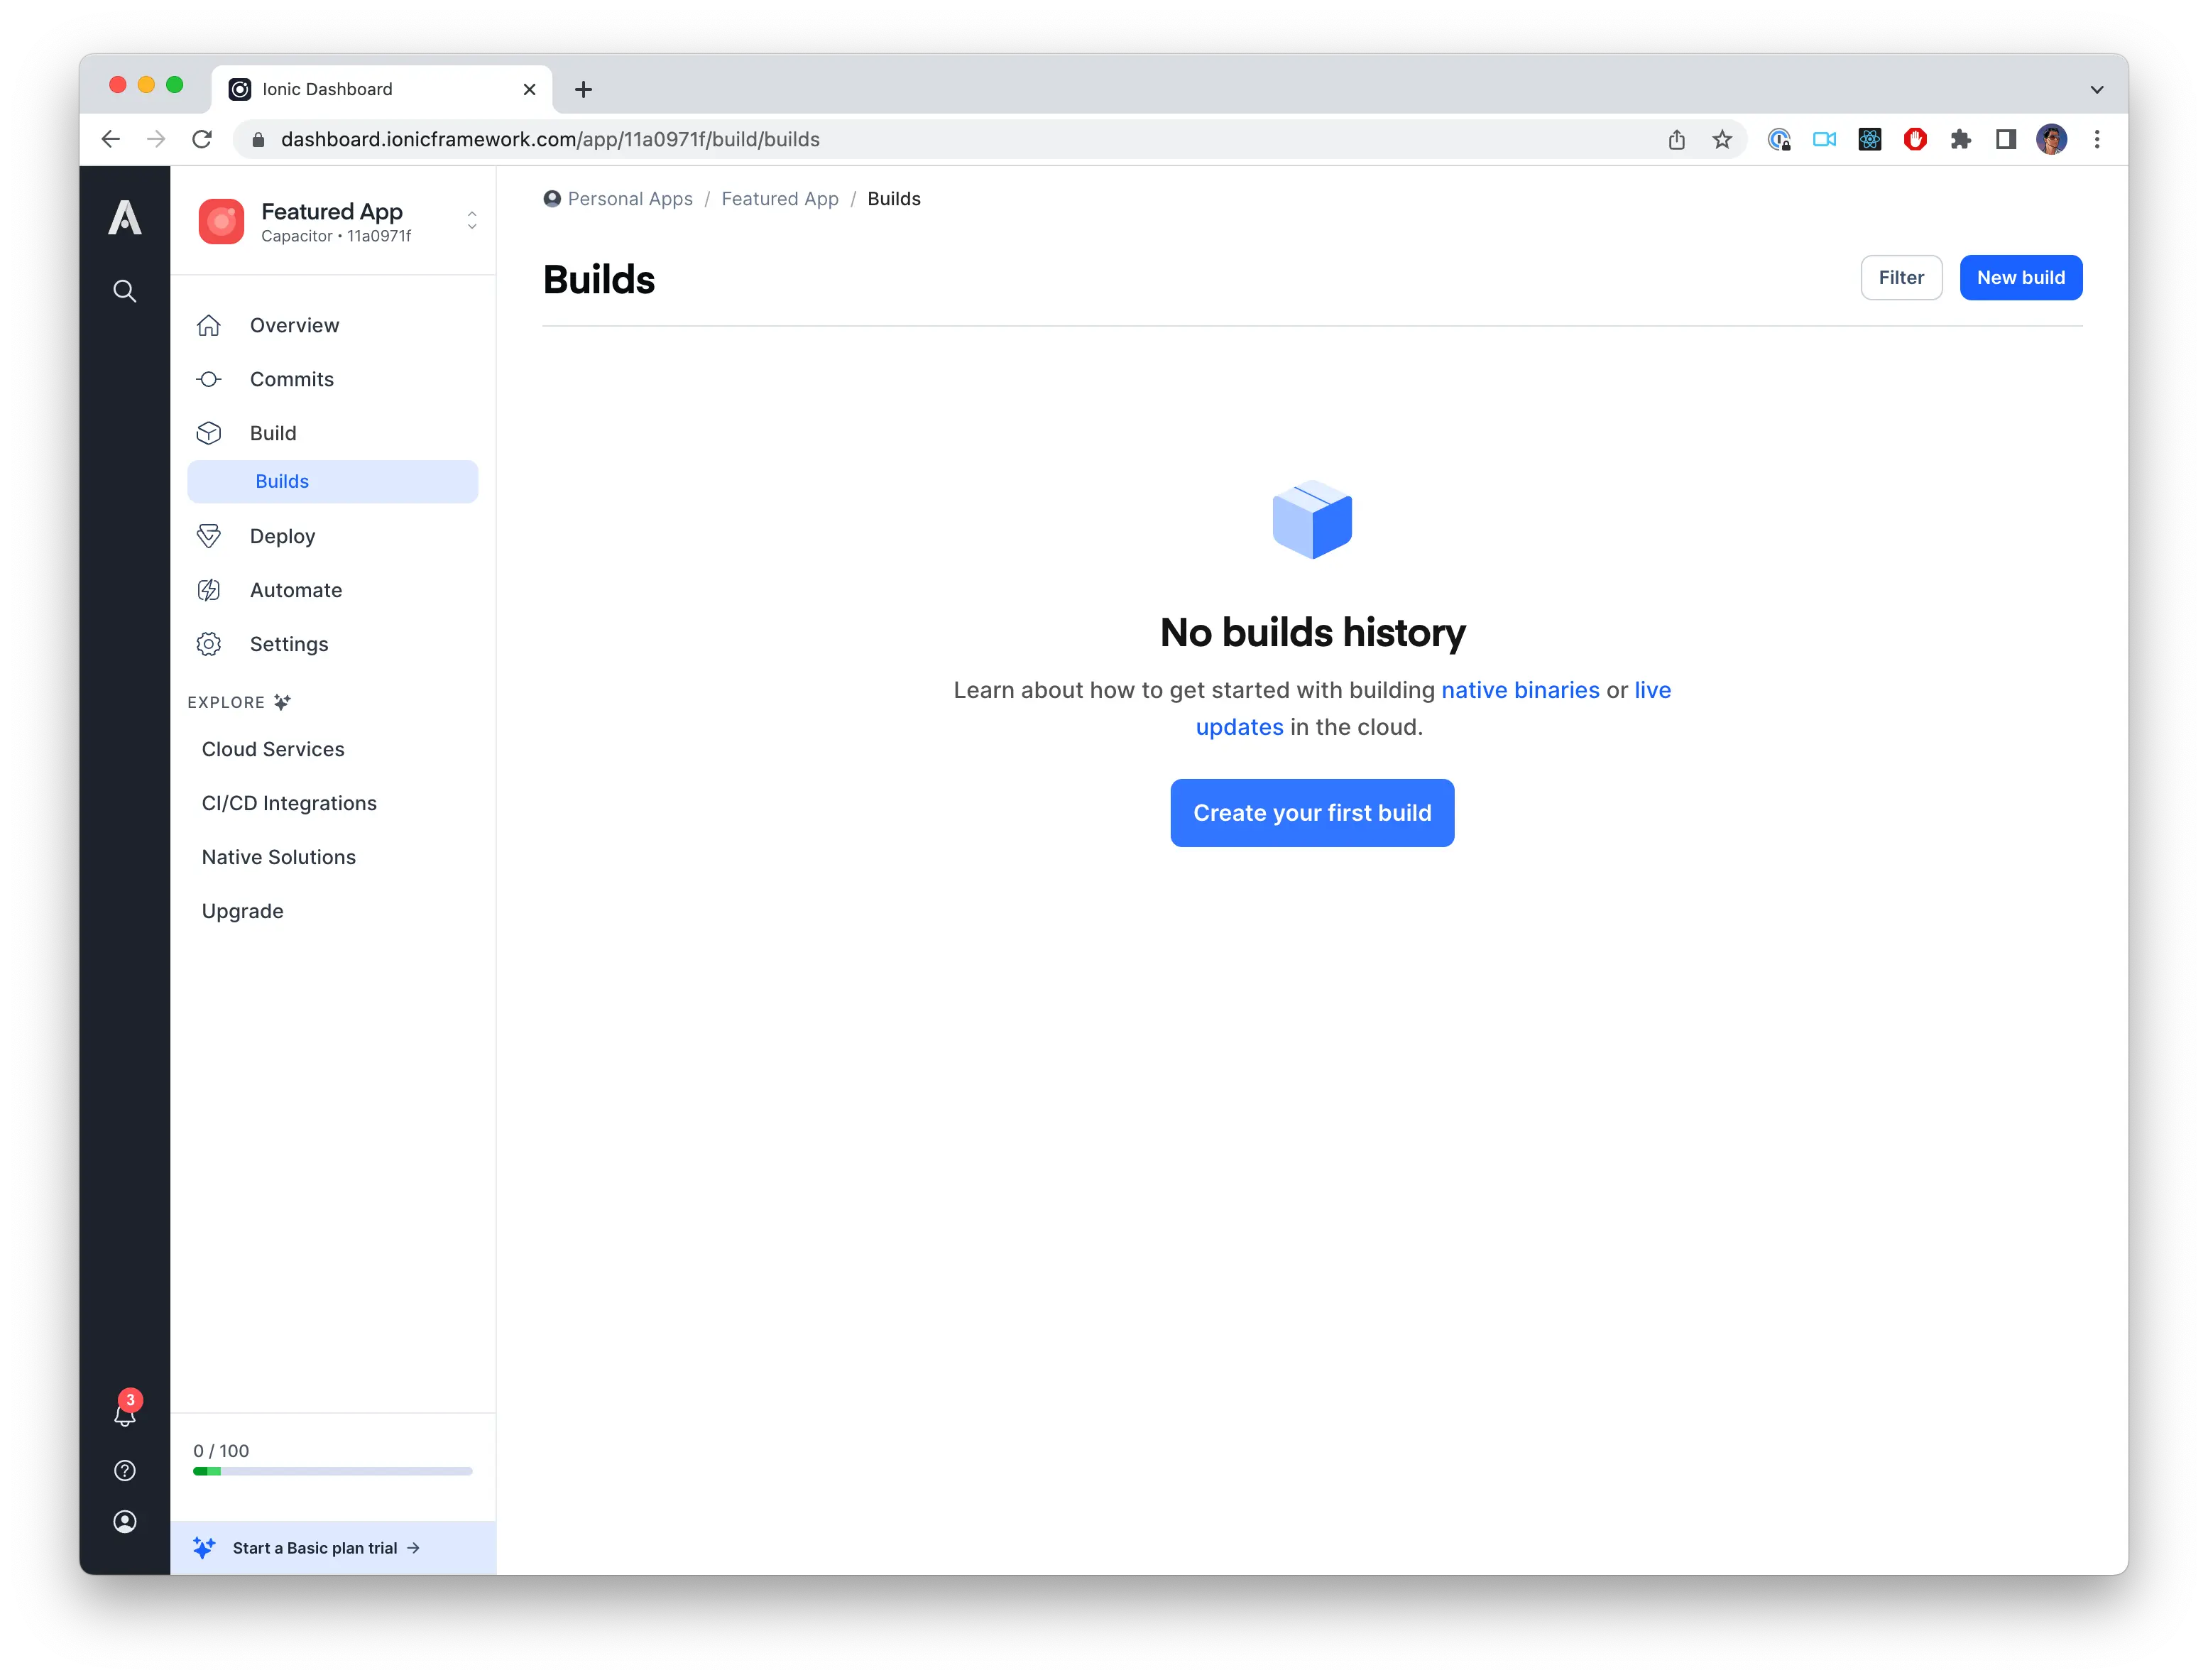
Also in the top left corner of these screens you will see the Appflow app ID. In this case it is 11a0971f. This id will be used when we configure the native application.
After the application has been added to Appflow you will need to create your first build so that it is available to seed the Portal in the Native App.
This can be done by clicking the New Build button on the Builds page. Then you will choose the appropriate commit to create the build from.
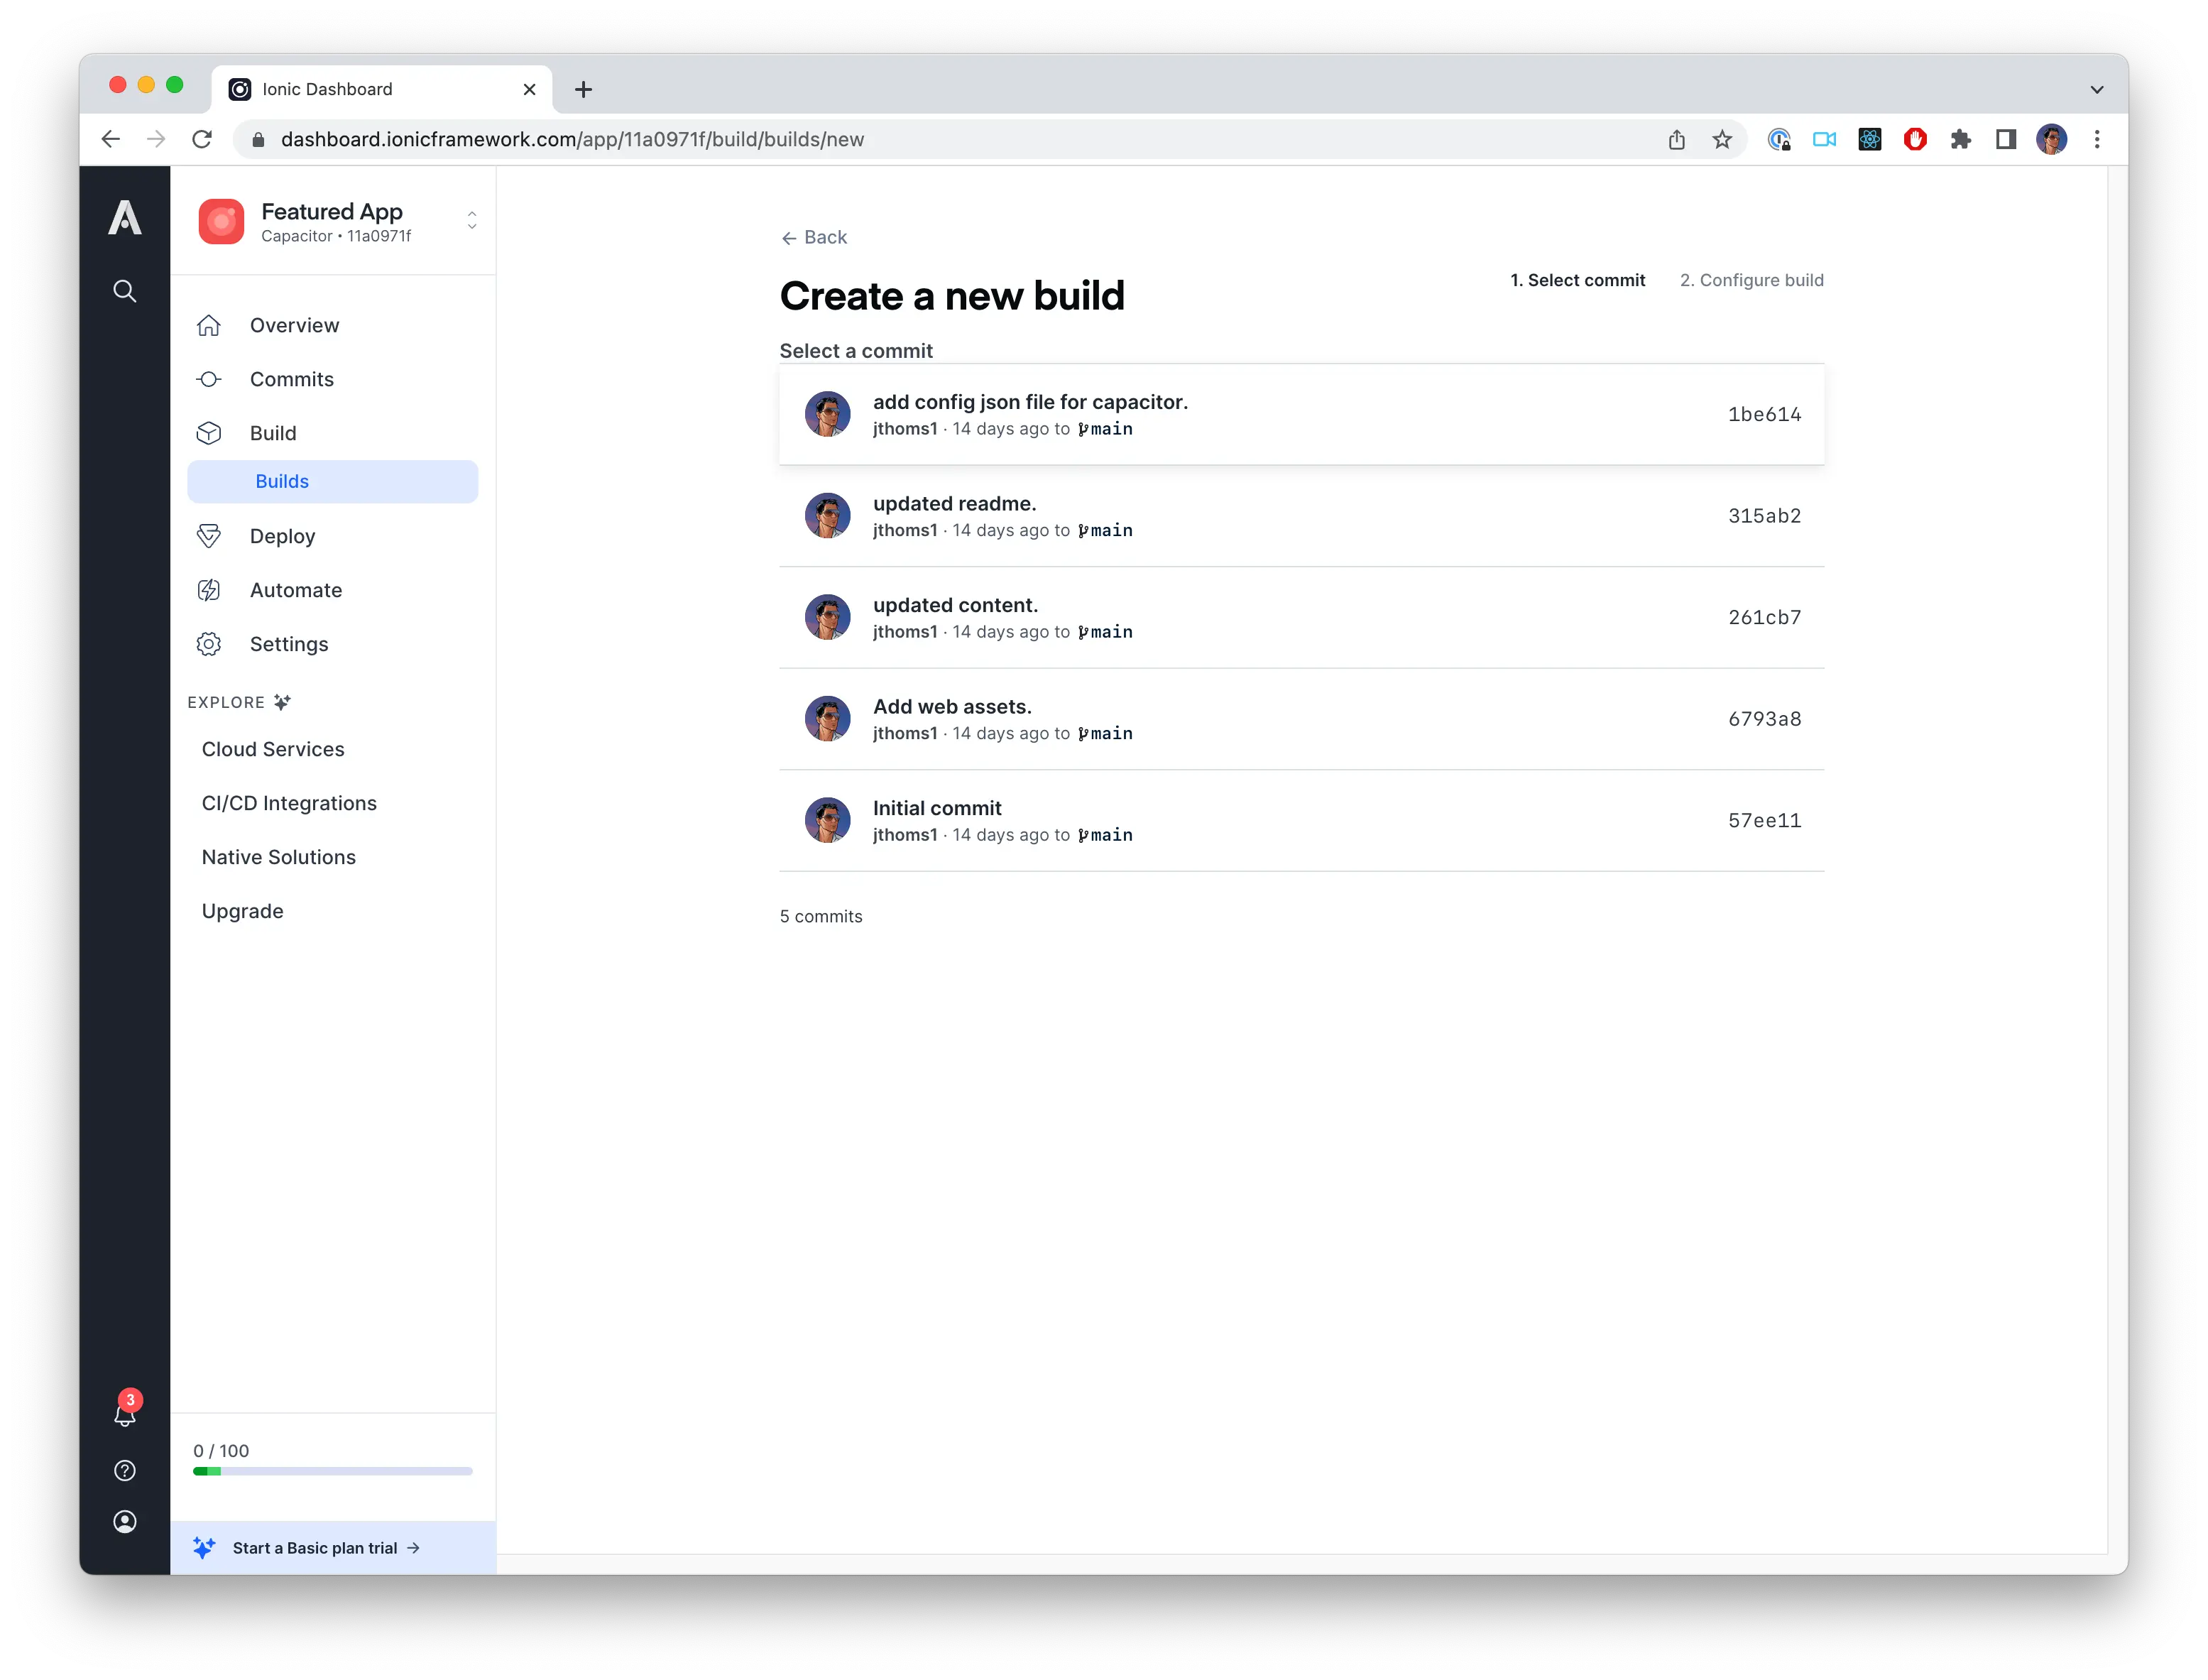
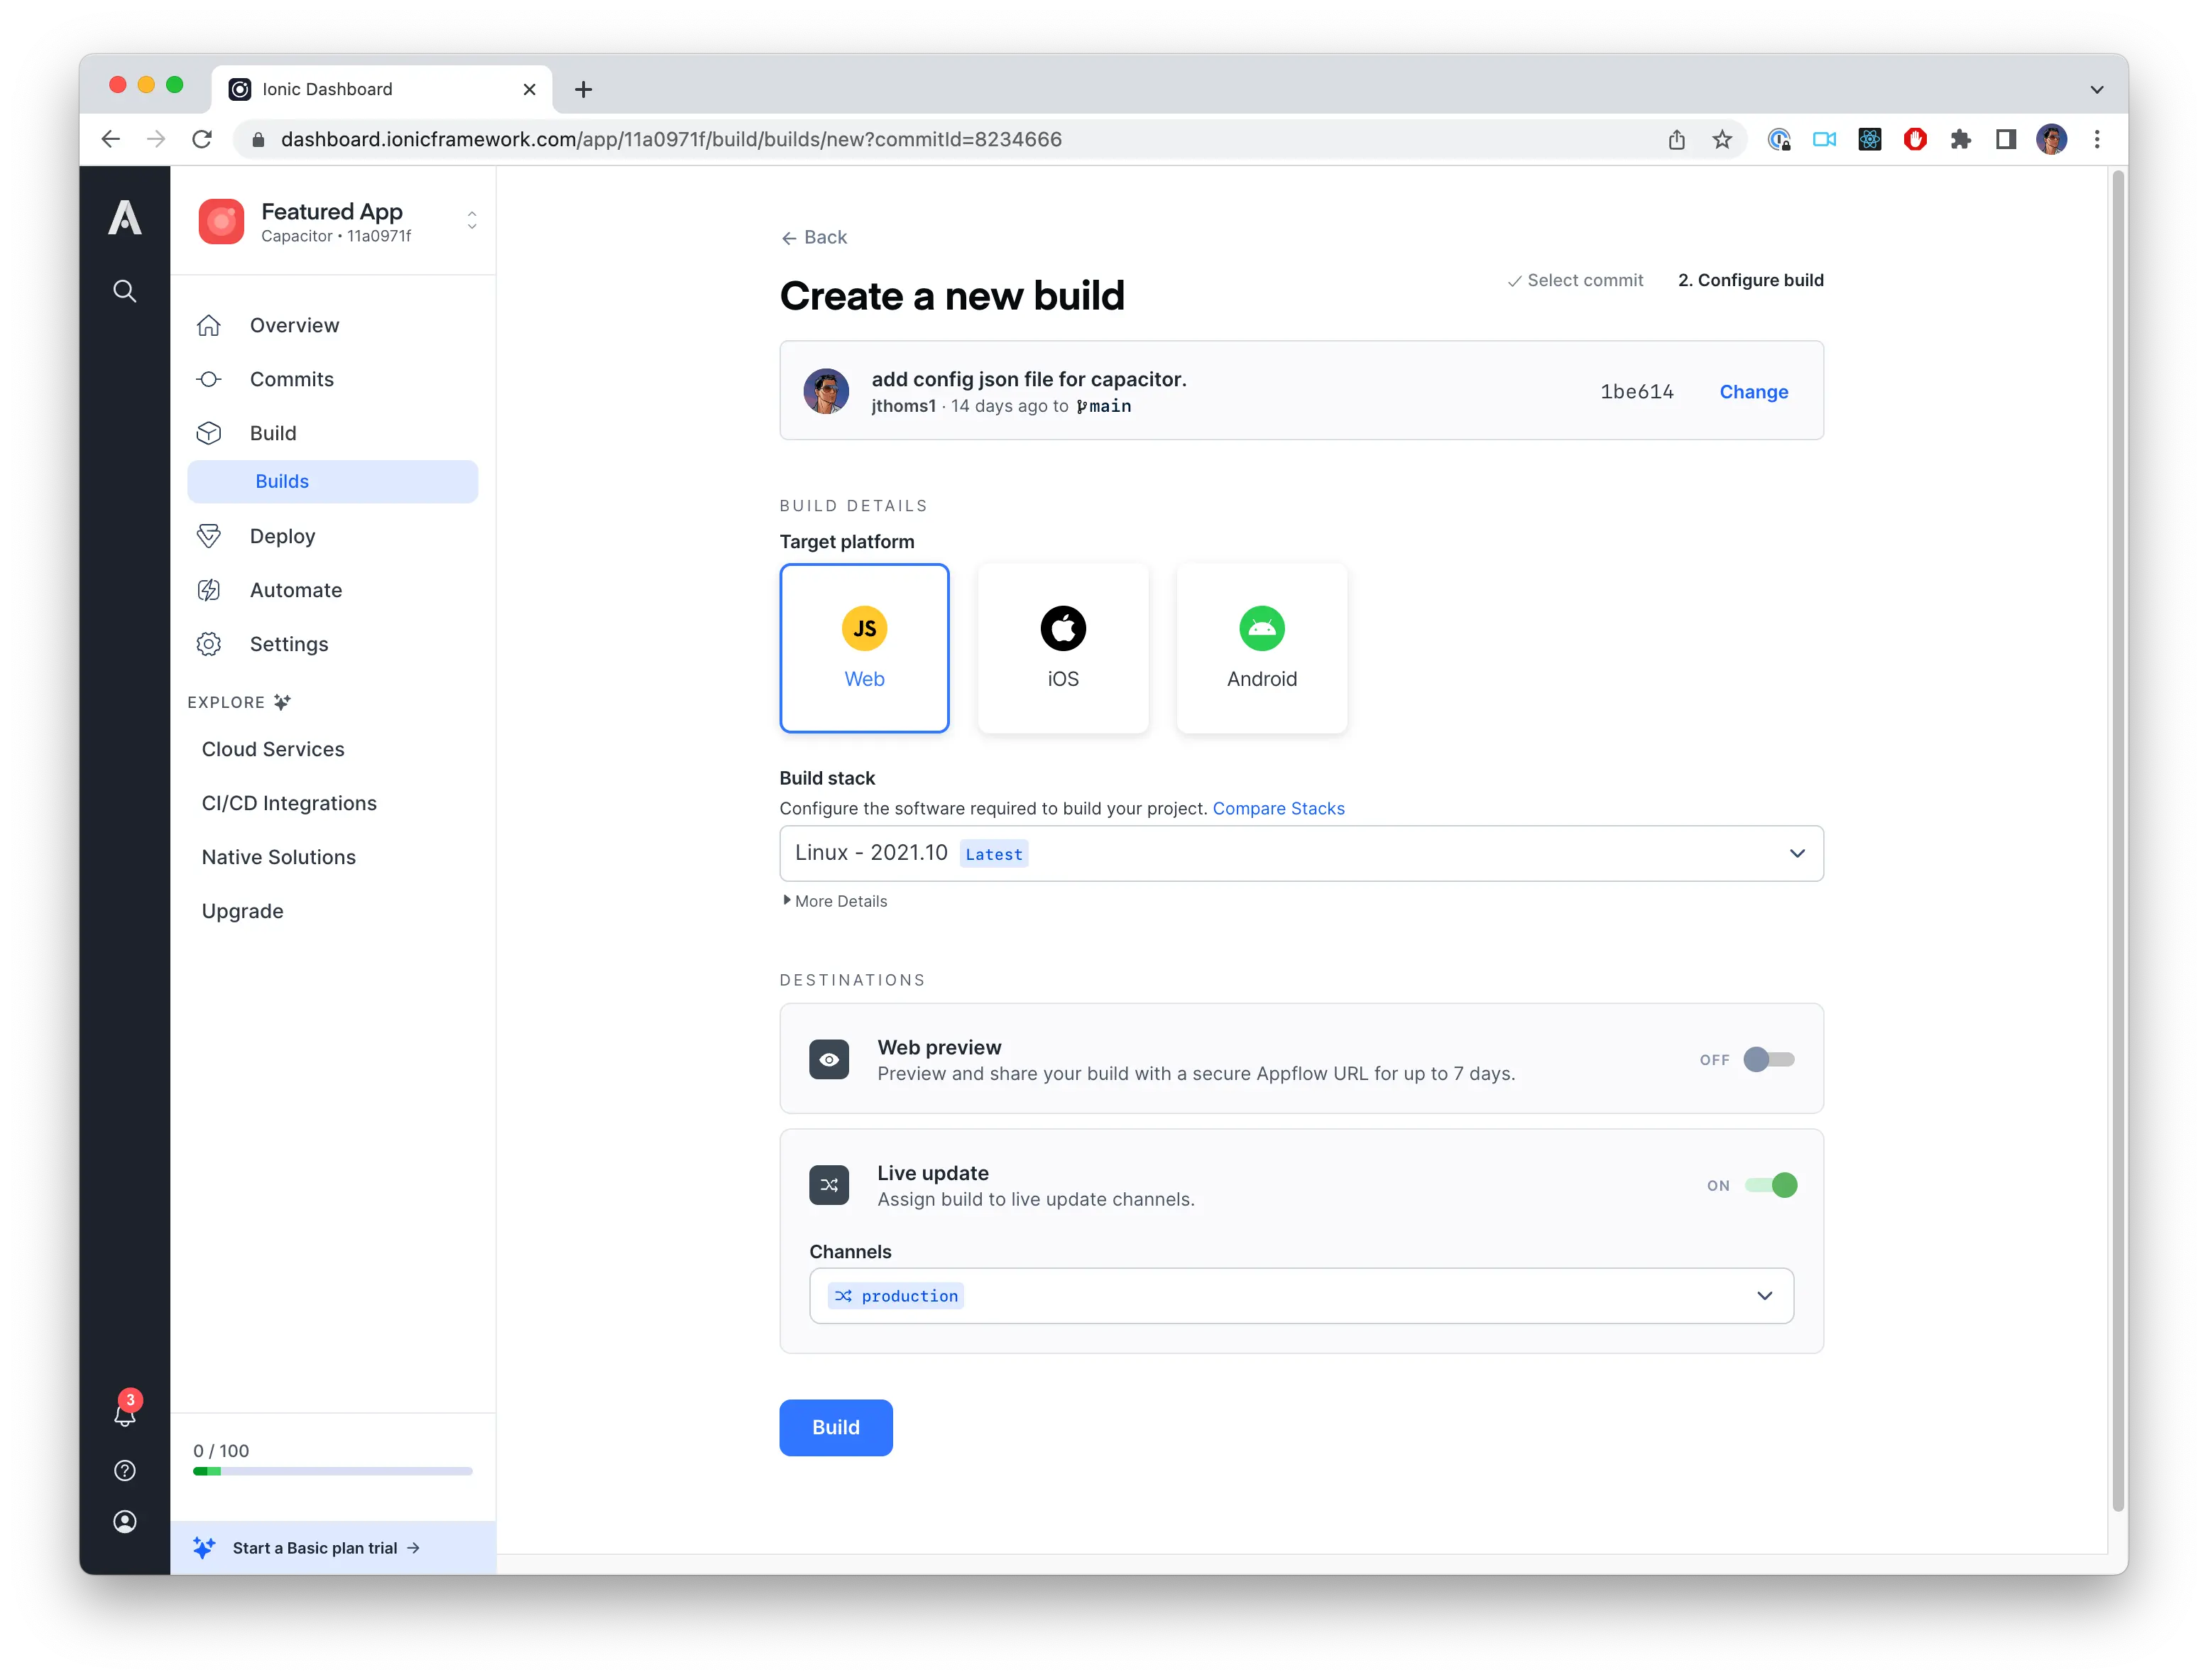
When creating a new build, Appflow will present a few configuration options.
- Target platform should be Web.
- Build stack should be the default latest build stack.
- Live update should be toggled on and the selected channel should be Production. This can also be configured after the build is complete.
Once you click Build, Appflow will spin up a new build runner that will install your project dependencies and build your web application. After the build is complete, it will deploy the build to our Production Live Update channel.
With the application build and deployed, you can:
- Use the Portals CLI to pull down the web bundle during development & the native build process.
- Add the Live Updates SDK into your app.
Seeding the Portal at build time
The Portals CLI offers some common functionality for native developers, including the ability to pull down the appropriate web bundles from Appflow using a single command.
Begin by following the installation instructions and ensuring the CLI is installed.
Creating a Personal Access Token
The CLI needs a means to authenticate with Appflow. To do this, we can create a Personal Access Token from the Personal Settings menu. Click the Generate new token button and optionally provide an expiration date for the token.
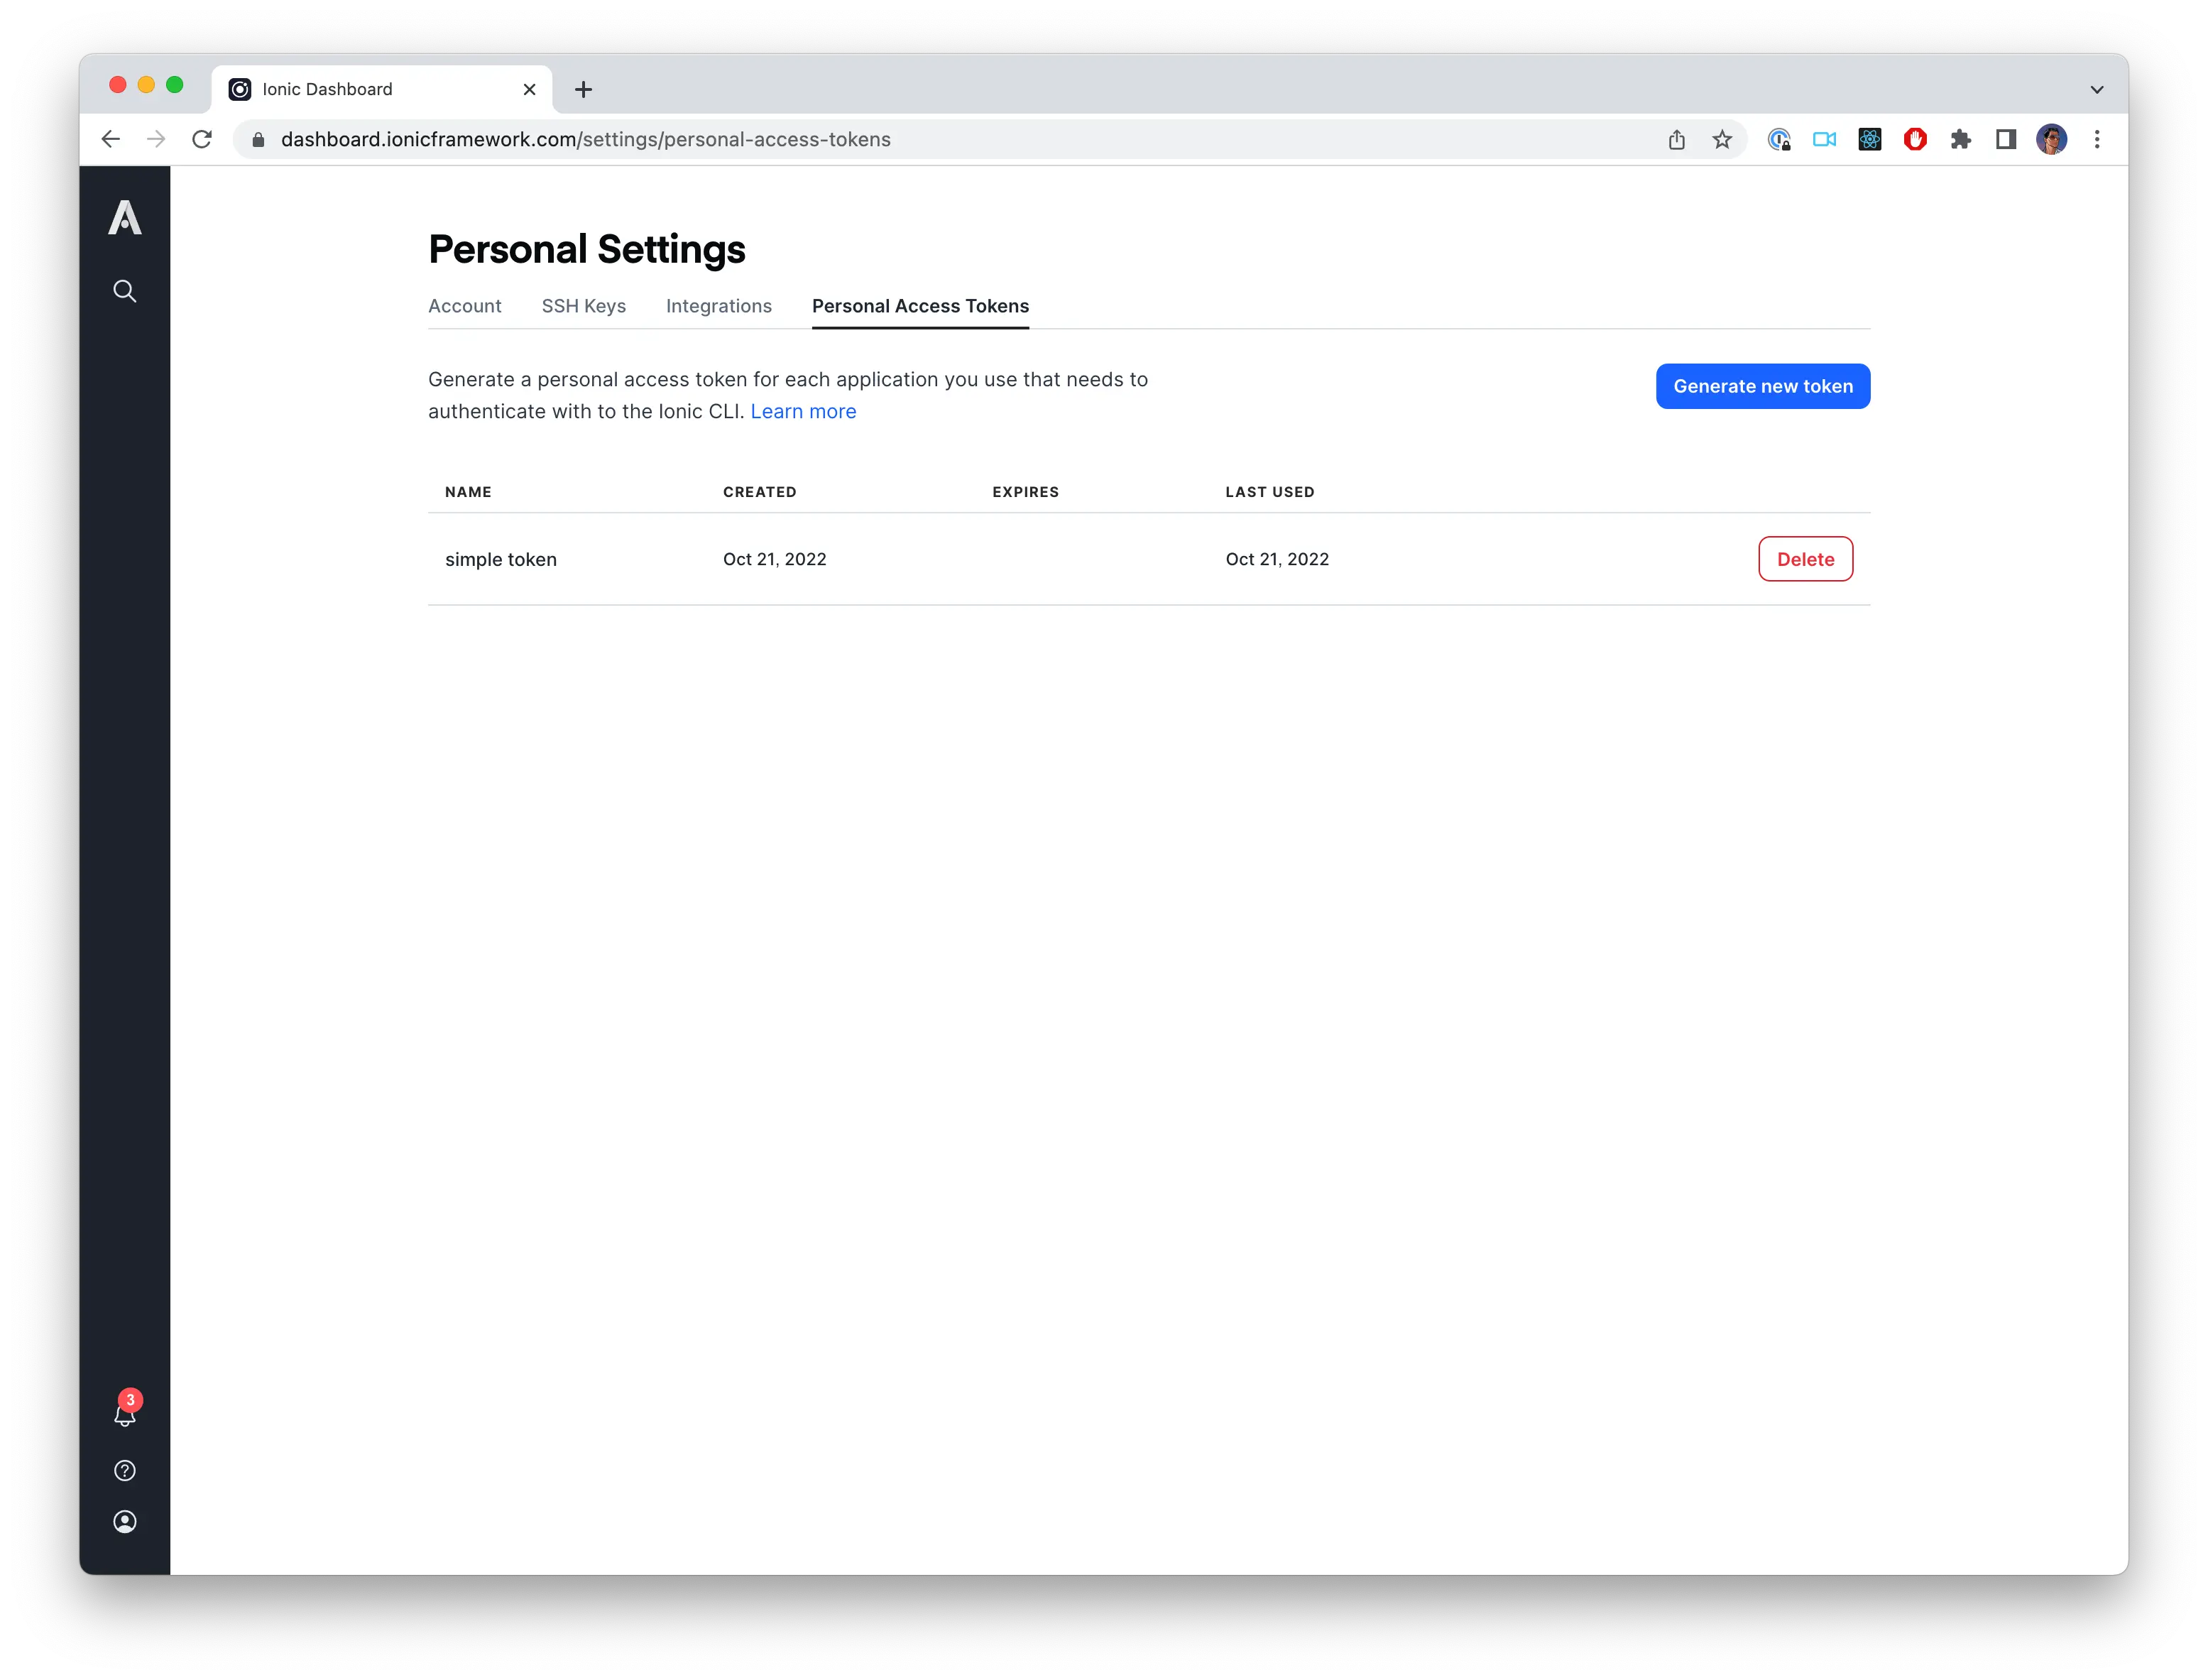
After the token is generated you will need to copy it to clipboard because it will be required for the next step. The token follows the format of ion_XXXXXXXXXXXXX.
Configuring the Portals CLI
In our native project, we will create a .portals.yaml file. This will contain a list of the apps we want to pull down from Appflow. In this example, we only have our demo application, but we can add as many apps as we'd like.
There are two key components for this configuration. The sync value will be a list of apps with their respective Appflow app IDs, Live Update channel names, and the file path the bundle should be copied to. The token value will the Personal Access Token generated in the previous step. Make sure to replace the app ID, directory name, and token with the appropriate values.
sync:
  - app-id: 11a0971f
    channel: production
    directory-name: portals/debug
token: ion_XXXXXXXXXXXXX
With this configuration in place, we can run portals sync from our terminal to download the specified web bundles. The specified directory-name should now be created and will contain the web bundle built in Appflow.
The Portals CLI can used both in development as well as your build pipeline. For more information on the CLI and its features, see the CLI documentation.
Updating the Portal over-the-air
Live Updates are not only useful for distributing your bundles during development & build time. They can also be used to distribute new web content directly to your users. Installing the Live Update SDK allows your app to download the most recently deployed web bundle from a specified channel at runtime. The downloaded version will be rendered in place of the version packaged at build time.
To install the iOS SDK, see our iOS documentation.
To install the Android SDK, see our Android documentation.
The channel specified in the configuration object refers to the channel to which we are deploying our web build in Appflow. In this example, we are using the default "Production" channel, however you can create as many Live Update channels as desired. Because the channel value is just a string that is being passed into the configuration, the channel name can be determined dynamically at runtime if necessary.
Conclusion
In this tutorial, we built a demo web app in Appflow, deployed it to a Live Update channel, used the Portals CLI to fetch Live Updates at build time, and configured the Live Update SDK. Optionally, you can review our Getting Started guide for web developers.